hello, Janika_

Welcome to
the world of
Claude Code.

A gentle guide to building things you’ve only imagined, starting with a beautiful little dashboard for your next trip.

Part 1 of 5, made for 
→ edit the name if you like, press enter to begin
A note before we begin, Janika

You don’t need to know how to code to build something real.

You already know how to brief a team, hold a line on a drawing, and spot a badly detailed junction at twenty paces. That instinct is the job here. Claude does the typing.

Think of Claude Code as a brilliant graduate architect on your team who types at ten thousand words a minute and has read every building manual ever written. They need a brief. They need rules. They need you to check the drawings. Give them those three things and they’ll build anything.

By the end of this guide you’ll have built your first real thing. Take your time. Every pause point in this deck is a chance to try it yourself.

A leather notebook open on a desk with a fountain pen and a dried lavender sprig
What we’ll build together

A trip
planner.
Your trip.

A live countdown to departure. A packing list that remembers. Your itinerary drawn like an Underground line, all on one page.

We’ll build it with a sample trip (Helsinki to San Diego) so it works straight away, then you swap in your real next one.

A pocket compass drawn as an Underground roundel, its needle pointing toward the next trip
Our Next Trip LIVE
HELSINKI →
SAN DIEGO
42 days to departure
Packing 9 of 14 packed
Itinerary Day 1
Helsinki HEL Depart 09:15 San Diego SAN Land 13:45 Hotel, Gaslamp Quarter Check-in 15:00
Chapter 00 · How to read this workshop

Six things
before you start.

This workshop is something you read and something you do. Six little habits make every page work the way it should. (Chapter 00 has three short pages; this is the first.)

A cream travel suitcase with four coloured route dots and a luggage tag, packed for the journey ahead
01

Dark boxes are for pasting.

Whenever you see a dark box, it’s something to copy and paste, never something to memorise or retype.

a dark box, ready to paste
02

Every box wears a label.

There are only two destinations. A red-dot label means the box goes into your chat with Claude (the conversation window, where you talk in plain English). A yellow-dot label means it goes into the Terminal (a typing window you’ll practise with, gently, before you ever use the real one).

Paste to Claude   Type in Terminal

03

Click to copy.

Hover over any dark box and a little copy tag appears in its corner. One click copies the whole thing. No careful selecting, no missed characters.

04

Links are real links.

Anything that looks like claude.ai or is underlined is clickable. Links open in a new tab, so you never lose your place here.

05

You never edit files by hand.

Not once, in the whole workshop. When a file needs creating or changing, you ask Claude to do it. Your job is deciding and checking. Claude’s job is typing.

?

The blue button is me.

Bottom-right of every page sits a round blue ?. Tap it with any question, at any moment, no matter how small it feels. It comes straight to me, and I read every single one. You are never stuck alone here.

Chapter 00 · The words we use

Six things,
six names.

Computer people have five nicknames for everything, which is half of why this stuff feels harder than it is. In this workshop, every important thing has exactly one name, and this card is where those names live. Nothing to memorise: you’ll meet each one properly as we go, and every deck links back here whenever a word feels wobbly.

Six paper luggage tags fanned out, one for each word this workshop uses
project folderwhere it lives
One folder on your Mac that holds everything for one project: the web page, the notes, Claude’s memory. Other tutorials say “repo” or “workspace” for roughly the same idea; we say project folder, always. The site itself: everything happens inside the hoarding.
the chatwhere you talk
The conversation window where you and Claude talk in plain English. Every red-dot paste to Claude box goes here. Briefing your contractor across the desk.
the Terminalwhere the Mac listens
The typing window where your Mac itself takes instructions, one line at a time. Every yellow-dot type in Terminal box goes here, and in this workshop that only ever happens during setup. The service hatch: rarely used, good to know where it is.
the presetthe launch button
A saved launch button at the top of Superset (the Mac app you’ll install). One click starts Claude; no typing. You’ll make yours once, during Hands-on #1, and press it forever after. Speed dial for your best builder.
the playbookthe method
Munim’s folder of building methods and starter kits, called Ship It. Part 2 hands you the key. Until then, just know the name. The office library of standard details, tuned over real jobs.
the safewhere keys live
The locked place where secret keys are kept (a tool called Doppler). Nothing secret ever sits in a plain file. Part 2 teaches it; nothing in Part 1 needs it. Site keys live in the key safe, never under the mat.
Chapter 00 · Which box goes where

Two windows,
two kinds of box.

Everything you paste in this workshop goes to one of two places: the chat, or the Terminal. Here they are side by side, wearing their labels.
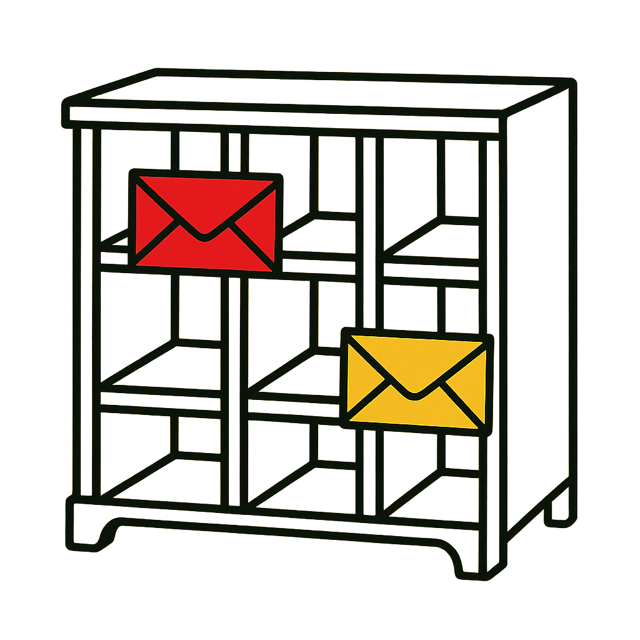
A wooden sorting office with six pigeonholes, one red envelope and one yellow envelope waiting
Paste to Claude make the countdown bigger and calmer, with more space around it

Reads like a sentence to a person. It goes in the chat, and Claude does the work.

Type in Terminal claude --version

Short code words. It goes in the Terminal, and only ever by pasting. In this whole workshop, the Terminal only appears during setup.

The rule of thumb

If it reads like English, it’s for Claude. If it looks like code words, it’s for the Terminal. And you never actually have to guess, because every box wears its label.

A one-minute game

Six boxes lost their labels.

Sort each one: chat or Terminal? Tap a button and see. Nothing here runs anywhere; it’s just you, training your eye.

“make the countdown numbers bigger and give them more breathing room”
xcode-select --install
“why is the page blank? here’s what I see…”
curl -fsSL https://claude.ai/install.sh | bash
“add a packing list that remembers my ticks”
claude
Chapter 00 · Where the Terminal lives

The + button,
then Terminal.

Once Superset is installed (Hands-on #1 walks you through all of that), opening a Terminal is one small gesture. Nothing to do right now: just look at the picture. Whenever a later page says open a Terminal, it links straight back to this drawing.

Drawn from memory, not photographed. Menus move as Superset updates; if yours looks different, ask Claude (“how do I open a terminal tab in Superset?”) or tap the blue ?.
1

Click the + at the top of the Superset window, in the row where the tabs live.

2

Click Terminal in the little menu that appears. A Terminal opens in a new tab, already inside your project folder.

Chapter 01 · The basics

So what is Claude Code?

Imagine a coding partner who:

  • →  Works right on your own computer (in a friendly chat, not the scary black window)
  • →  Reads and writes files for you
  • →  Runs the commands so you don’t have to
  • →  Never gets tired or annoyed
  • →  Works at whatever pace you do

That’s Claude Code. A chat window, connected to your computer, with Claude on the other end.

~ claude
> can you make the button bigger?
… thinking
Done. I updated the padding from 12px to 20px.
> and change the colour to red
Changed to #E32017. Refresh to see it.
Chapter 02 · How it works

The whole thing,
in one picture.

Three players. That’s it.

You
the architect
Claude
the contractor
Your Mac
the site

You brief Claude. Claude builds on your computer: reading files, writing code, running commands. You watch, comment, and steer. Same dynamic as you and a good contractor, just compressed into minutes instead of months.

Pause · A rehearsal

Try the Terminal.
Stakes: zero.

The next hands-on uses the real Terminal for a few minutes of one-time setup. Before that, here’s a pretend one that lives inside this page. Click a suggestion below and watch: the command types itself, the answer comes back, and nothing touches your Mac.

A friendly little terminal window on a theatre stage with red curtains, ready for a rehearsal
~ rehearsal (not your real Terminal)
# A practice terminal. Click a suggestion below to see what happens.
~ %

date asks the Mac for today’s date · whoami asks who’s logged in · claude is the word that wakes Claude up (your launch button will press it for you)

That was a rehearsal Nothing ran on your Mac, and nothing could: this terminal is just part of the page. The real one works exactly like this. You type (or paste), you press Return, it answers. It never does anything until you press Return.
What the Terminal really is

A plain window where you give the Mac one typed instruction at a time. No menus, no buttons, just call and response. In this entire workshop you’ll only use it during setup, and only ever by pasting yellow-label boxes. After that, Claude does the typing.

Pause · Hands-on #1 · Part A of E

First,
a Claude account.

Hands-on #1 comes in five short parts, A to E: account, tools, Superset, launch button, first launch. Take them in one sitting or several; every part ends somewhere safe to stop. Part A is just shopping: your browser, an account, the Pro plan. Nothing gets installed. (Fresh from Chapter 00: boxes wear labels, links are clickable, and the blue ? is always there.)

A vintage paper travelcard with a punched hole and a star stamp: your ticket in
Part A · Your account

Sign up, go Pro.

Claude Code needs a paid plan, and Claude Pro (one flat monthly fee) comfortably covers everything in this workshop.

1. Open claude.ai In your browser, open claude.ai. What you should see: a welcome page inviting you to sign up or log in. If instead you land straight in a chat, you already have an account: skip to step 3.
2. Sign up Click Sign up and use your everyday email (or Continue with Google or Apple). If you go the email route, Claude emails you a short login code: type it in. What you should see: you’re in, and Claude’s chat page says hello. If the code hasn’t arrived after a couple of minutes, check your spam folder.
3. Find the plans page Open claude.ai/settings/billing and choose the Claude Pro plan. What you should see: a normal card payment form, like any online shop. If the page looks different from what you expected, the plans can also live under Settings → Billing inside the chat page.
4. Pay, and check the badge Enter your card and confirm. What you should see: your settings now say Claude Pro. That badge is Part A done. If the payment balks, tap the blue ? with what the screen says.
What it costsOne flat monthly fee covers this whole workshop. No per-message charges, no surprise bills, and you can cancel any time from the same billing page.
What’s on your MacNothing yet. Part A lives entirely in the browser; you haven’t installed a thing.
If the screens differThese pages are drawn from memory and claude.ai redecorates now and then. The goal is simply: an account, on the Pro plan. Any route there is the right route.
Pause · Hands-on #1 · Part B of E

Teach your Mac
to build.

Two installs, both done by pasting yellow-label boxes into the Terminal: Apple’s own building toolkit first, then Claude Code itself. You met this window in the rehearsal; now the real one, which behaves exactly the same way.

A classic safety hard hat with a whistle: the tools get fitted before the building starts
Part B · Two installs

Open the Terminal, paste twice.

Each step is one small gesture. After each one, check the what you should see line before moving on.

1. Press ⌘ + Space Hold the command key (⌘, next to the space bar) and tap Space once. What you should see: a search bar pops up mid-screen. That’s Spotlight, the Mac’s everything-finder. If instead nothing appears, click the little magnifying glass at the top-right of your screen.
2. Type Terminal, press Return What you should see: a plain window with a line or two of text and a blinking cursor, just like the rehearsal. It will sit there doing nothing until you press Return, so you cannot set anything off by accident.
3. Copy the first box, paste it in, press Return Click the box below (one click copies it), click inside the Terminal window, paste with ⌘ + V, then press Return.
Type in Terminalxcode-select --install
What you should see: a macOS dialog pops up offering to install “command line developer tools”. If instead the Terminal prints already installed, you’re ahead of the class: skip to step 5.
4. Click Install in the dialog Accept the licence and let it run. What you should see: a progress bar. It’s about 2 GB and takes a while: a perfect kettle moment. Wait until it says it’s finished before the next step.
5. Copy the second box, paste, Return Same gesture: click the box, click the Terminal, ⌘ + V, Return.
Type in Terminalcurl -fsSL https://claude.ai/install.sh | bash
What you should see: lines of text scrolling by for up to a minute. That’s the installer narrating, and it’s completely normal. It ends with a success message. (This is Anthropic’s official Claude Code installer.)
6. Prove it landed One more paste, to check the install took:
Type in Terminalclaude --version
What you should see: a version number, something like 2.1.201 (Claude Code). A number means Claude Code is on your Mac. If instead it says command not found: close the Terminal window completely (the red dot), open a fresh one with ⌘ + Space, and try this step again. Still stuck? Blue ?, with the exact words on your screen.
Why it’s safeBoth boxes are official installers: Apple’s toolkit and Anthropic’s Claude Code. They add tools; they don’t touch your files, photos, or anything you’ve made.
What it costsNothing. Both installs are free; your Pro plan only covers the chatting.
Quiet is normalInstallers sometimes say nothing for a minute, then wake up. Silence isn’t failure; give it a moment before worrying.
Pause · Hands-on #1 · Part C of E

Superset,
your site office.

Claude Code is the brain. Superset is the beautiful Mac app it lives in: your projects, your chat, and your launch buttons, one calm window. (Anthropic also makes an official Claude Code desktop app; Superset is the one this workshop uses.) Install it, take the thirty-second tour, then make your project.

Part C · Install & tour

Get it, open it.

1. Download Superset In your browser, open superset.sh and click the big Download for macOS button. What you should see: a file arriving in your Downloads.
2. Open the file, drag to Applications Double-click the downloaded file. A little window appears with the Superset icon and your Applications folder; drag the icon onto Applications. What you should see: a brief copy, then done. You can close that window and eject the little disk icon if one appears (right-click → Eject); or just leave it.
3. Launch it Press ⌘ + Space, type Superset, press Return. What you should see: Superset’s welcome window. If instead macOS grumbles that it “can’t be opened”, open your Applications folder, right-click Superset, choose Open, then Open again. One-time ritual.

The map, before the territory.

Before you click anything, here’s the whole window. Tap each numbered dot (or hover) and the caption below tells you what that part does.

trip-planner +
Presets: ▸ Claude ▸ Deep thinker
Projects
trip-planner
(your next idea)
make the button bigger?
Done. I widened the padding; refresh to see it.
Type to Claude here…

Tap a numbered dot to see what each part of the window does.

Drawn from memory, not photographed. Superset updates often and menus move; if yours looks different, ask Claude or tap the blue ?.

Part C · Your project

Make the trip-planner project.

4. Click New Project (Some versions say New Workspace: Superset’s word for a project folder, opened.) Name it trip-planner. Don’t click Create yet.
5. Point the Location somewhere you can see Click the folder icon (or the Location field) and choose your Desktop. Why: the suggested spot, ~/.superset/projects, is invisible in Finder (anything starting with a dot is hidden on a Mac), and you want to be able to find your own files. What you should see: the Location now reads something like ~/Desktop.
6. Click Create What you should see: a new tab named trip-planner along the top, with an empty chat area waiting. If Superset asks which agent this project should use, choose Claude Code.
Already created one in the hidden spot? No harm done. Open Finder, press ⌘ + Shift + G, paste ~/.superset/projects/trip-planner, press Return: your files are all there. For future projects, use the Desktop trick above.
What a project isJust a folder plus a chat. Deleting a project later is dragging one folder to the bin; nothing else on your Mac is involved.
Nothing sent anywhereCreating a project is local. No account, no upload, no one watching.
Pause · Hands-on #1 · Part D of E

Make your
launch button.

You’ll never start Claude by typing. You’ll press a saved button called a preset (from the words card). Make it once; it shows up in this project and every future one.


A cosy site-office desk with neat window tabs above it, one carrying a small plus-shaped cutout
The button you seeWhat it presses for you
▸ Claude claude
▸ Deep thinker claude --model opus
A big friendly launch button drawn in the deck's cream and red palette

A preset is saved typing, nothing more: a name on a button, and the Terminal words it presses so you never have to.

Part D · One-time setup

Create the preset.

1. Open Superset’s settings Click Superset in the menu bar (top-left of your screen, next to the apple) and choose Settings. (Or press ⌘ + comma.) What you should see: a settings window.
2. Find Terminal Presets, click Add Preset Look for a Terminal section, then Terminal Presets. What you should see: an empty form asking for a name and a command. If the menus have moved (Superset updates often), tap the blue ? and tell Munim what you see; he’ll point you at the right spot. (You haven’t launched Claude yet, so the ? is your helper for this one.)
3. Name it Claude, command claude, save Name: Claude · Command: claude What you should see: a pill named Claude in the preset bar near the top of the app (dot 2 on the map). That’s your launch button, forever.
4. (For later) One preset per brain When you meet the different Claude brains in Chapter 11, come back and add a second preset: name Deep thinker, command claude --model opus: a dedicated button for the slower, more thorough Claude. Entirely optional today.
If the preset drops you into a plain terminal It occasionally doesn’t connect on the very first try. No panic. Open a Terminal (the + button, then Terminal) and paste this one line, which saves a shortcut word called startclaude (a plain launch word, nothing to do with the “opus” deep-thinker recipe above):
Type in Terminalecho 'alias startclaude="claude"' >> ~/.zshrc && source ~/.zshrc
From then on, typing startclaude and pressing Return starts Claude. If that says command not found, use the spelt-out version:
Type in Terminalecho 'alias startclaude="$HOME/.local/bin/claude"' >> ~/.zshrc && source ~/.zshrc
One-time onlyPresets live in the app, not the project. Every project you ever make gets the same buttons for free.
Freely changeableRename, edit, or delete presets whenever. They’re saved typing, not machinery.
Pause · Hands-on #1 · Part E of E

Turn the key.

Everything’s installed. One click, three little first-time screens, then hello. The exact screens shift a little between versions; these are the ones to expect, in order.

Part E · First launch

Press the button, say hello.

1. Click your Claude preset In your trip-planner tab, click the Claude pill at the top. What you should see: text appears and Claude Code introduces itself. Ten quiet seconds first is normal. If you can’t find the preset bar, open a Terminal instead (the + button, then Terminal), type claude, press Return.
2. Screen 1 · Log in Your browser opens by itself, asking you to approve the connection. Sign in with the account from Part A and click Authorize. What you should see: the page says you’re done and can return to your terminal. If the browser never opened, Claude printed a link instead: click it.
3. Come back to Superset What you should see: Claude confirms you’re logged in (a press of Return sometimes nudges it along).
4. Screen 2 · Trust this folder Claude asks whether it may read and edit files in this folder. Use the arrow keys and Return to answer Yes. Why yes is right here: it’s your own brand-new, empty project folder; that’s exactly what trust is for. The habit to keep: only say yes to folders that are yours.
5. Screen 3 · Colours (if asked) Dark, light, or auto (auto follows your Mac). Pick what reads best; you can change it any time later by typing /theme in the chat.
6. Say hello What you should see first: an input line with a blinking cursor, waiting. That’s the chat. Now:
Paste to Claudehi! I’m brand new to all of this. in a couple of friendly sentences, who are you and what can you do for me?
What you should see: a warm, plain-English reply. If it thinks quietly for ten seconds first, that’s reading, not crashing.
CostThis chat, and everything you build in Part 1, sits inside the Pro plan you already bought. Nothing here bills extra.
PermissionOut of the box, Claude asks before touching any file or running any command. Nothing happens without your yes.
ReversibleAnything Claude ever builds can be rolled back. Chapter 16 hands you the rewind lever; for now, know the net exists.
Why Superset?

Same Claude, but with a proper home: your files, the changes Claude makes, and the chat, all in one window, one tab per project. Think of Superset as the site office; the bare Terminal was the open pavement.

Stuck on any part of Hands-on #1? Take a breath. Tap the blue ? and send Munim the exact words on your screen. Help is one message away, always.

Pause · Hands-on #2

Three warm-ups.

You’re in the chat, cursor blinking. Before the trip planner, three tiny asks to feel the loop: you say it, Claude does it, you check it with your own eyes.

Try these · One at a time

Your first three prompts

Paste each one, press Return, watch what Claude does, then check the what you should see line. No wrong answers here.

1. Ask about the folder
Paste to Claudewhat’s in this folder right now? explain it like I’m brand new to all this.
What you should see: Claude may first ask permission to look around; say yes (that’s the safety net doing its job). Then a plain-English answer, roughly “almost nothing, it’s a fresh project”.
2. Ask it to make something
Paste to Claudecreate a file called hello.txt with a nice welcome note inside
What you should see: Claude asks permission to create the file (its first write). Say yes, and it confirms. Now check with your own eyes: open Finder, go to Desktop, open the trip-planner folder. There’s hello.txt, really on your Mac. Double-click it and read your note. If you can’t find it, ask Claude: “where exactly did you save hello.txt? give me the path in plain words.”
3. Ask it to change the note
Paste to Claudemake the welcome note more cheerful and add three emojis
What you should see: Claude shows the change it wants to make as a before-and-after view (called a diff: green lines are new, red lines are gone) and waits for your okay. Approve it, then open hello.txt again: cheerier, with emojis.
What just happened

Claude understood what you wanted, acted on your actual Mac, and showed you before it changed anything. That’s the whole loop. Everything else in this workshop is just scaling it up.

ContainedEverything happened inside one folder you created ten minutes ago. The rest of your Mac wasn’t touched.
ReversibleDon’t like the note? Say “put it back the way it was”. Claude keeps track; Chapter 16 shows the full rewind lever.
CostAll three prompts together: a sliver of your plan. Chatting is cheap; there is no meter anxiety here.
Chapter 03 · The words

Six words
to start with.

Learn these and you’ll understand most of what people say about AI coding. Don’t memorise them, we’ll use each one as we go, and a few more will show up along the way.

Context01
Everything Claude can see in this exact conversation. The chat, the files you’ve shown it, the errors it’s seen. Like a whiteboard you share, wiped clean when you start again.
Memory02
Notes Claude keeps for itself, across sessions. Things you’ve asked it to remember, your preferences, your project rules. Like a notebook that survives the day ending.
Prompt03
Whatever you type to Claude. A question, an instruction, or a ramble. The better you explain, the better Claude performs.
Model04
The specific brain you’re talking to. Claude has a few, some are slower and deeper, some are fast and sharp. Like picking between a novelist and a sprinter for the job.
Tool05
A specific thing Claude is allowed to do. Read a file. Write a file. Run a command. Search the web. Each one is a verb Claude can use on your behalf.
Agent06
A helper Claude can spin up to handle a specialist task, a reviewer, a researcher, while the main Claude keeps the plot. Like delegating to a teammate for a focused job.
Chapter 04 · Claude’s short-term memory

Context is
the whiteboard.

Every conversation has a shared whiteboard. Claude can only see what’s written on it right now.

What goes on the whiteboard: your messages, the files you’ve shown it, the outputs of commands it’s run.

What does not: yesterday’s chat, other projects, anything on the internet it hasn’t been shown.

Claude
sees this
Rest of the world
The whiteboard
Why it matters

The whiteboard fills up. When it does, Claude starts forgetting the earliest things you said. Keep chats focused. Start a fresh session for each new topic.

Chapter 05 · Claude’s long-term memory
~ CLAUDE.md
# Trip Planner Project

## About the trip
Helsinki to San Diego,
14 to 21 August.
Me plus one travel companion.

## Rules for Claude
- Keep the design clean and modern.
- Draw the itinerary like a tube line.
- Ask before installing anything new.

## Style
- Rounded corners, soft shadows.
- San Francisco font (the Apple one).

Memory
is a note
to itself.

The whiteboard gets wiped. Memory doesn’t.

There’s one magic file called CLAUDE.md. Whatever’s in there, Claude reads at the start of every session.

Tell it who you are, what you’re building, and how you like things. It’ll remember next time too.

And true to form, you never open this file yourself: say “add that to CLAUDE.md” and Claude writes its own note.

Chapter 06 · The one file that matters most

CLAUDE.md is
your project code.

Every construction project has a code sheet: the rules, the conventions, the “how we do things here”. CLAUDE.md is the same thing for your project, and Claude reads it every single time you start a session.

Get this file right and Claude feels like it’s known the project for months. Get it wrong, or bloat it, and every session starts with it noisily clearing its throat.

CLAUDE.md 60 lines About the project Rules for Claude Style & conventions A1

The ideal CLAUDE.md, one page, tidy

Six rules straight from the Claude Code team.

Boris Cherny (the engineer who built Claude Code) and his team share one CLAUDE.md across Anthropic’s whole codebase (their entire shared project). Here’s how they keep it healthy.

01

Keep it short.

Aim for under 300 lines. The best ones sit under 60. Every line goes into every session, so every line is paying rent.

02

Only universal things.

Don’t put rules that only apply sometimes. If it only matters in one corner of the project, make a second CLAUDE.md inside that folder.

03

Grow it by correction.

When Claude makes a mistake, end your correction with: “Update your CLAUDE.md so you don’t make that mistake again.” It is strangely good at writing rules for itself.

04

Let /init start it.

Type /init in Claude and it writes you a sensible first draft based on what your project looks like. You refine from there.

05

Prune it monthly.

Ask Claude: “read our CLAUDE.md and suggest what we can cut. We want it tighter.” A fresh pair of eyes keeps the project code readable.

06

Commit it to Git.

CLAUDE.md belongs with the project, not on your Mac. When you save checkpoints, it gets saved too. Future-you will thank past-you.

Architectural parallel

Think of CLAUDE.md as the project execution plan: site constraints, office standards, approved materials, responsibilities. Read on day one of every stage. Grows only when a lesson learned earns its place.

Chapter 07 · The five lines that matter most

Five rules
to start with.

You don’t type these into the file yourself; that’s Claude’s job. On day one, copy the box below and paste it to Claude. It will add the rules to your CLAUDE.md, minus any that don’t fit your project. Grow the rest as you go.

Paste to ClaudePlease add these five rules to this project’s CLAUDE.md, exactly as written. If one clearly doesn’t apply to this project, leave it out and tell me. ## TIER 1 : Five rules for day one ### 1. The spec wins every conflict. If a plan or piece of code contradicts the spec, the spec wins. Stop and flag it. ### 2. Explain before you edit. Before changing any file, tell me what you plan to change and why. No surprise diffs. ### 3. No stubs, no placeholders. If you can’t implement something fully, stop and ask. No “TODO” markers. ### 4. Stay inside the current scope. Build only what the current phase specifies. Note discoveries elsewhere. ### 5. Explain before you change course. If the planned approach is blocked, stop. Explain the problem, present 2-3 options, wait for a call.

→ Full 20-rule starter: templates/CLAUDE.md.starter in ship-it, the playbook folder you’ll meet properly in Part 2. Tests-before-code and fourteen other rules live there, ready when you are. (A spec, in rule 1, is simply the written description of what you’re building. Part 4 is built around them.)

Why CLAUDE.md exists at all

There’s a well-known pattern in AI-assisted coding called the 70% problem: AI will happily get you to something that almost works, fast. The last 30% is where projects stall: edge cases (the odd situations nobody thought of, like a trip with no return date), consistency, the little details. CLAUDE.md is how you close that gap. Every rule you put in it is a small piece of taste Claude can now share with you.

Chapter 08 · How Claude thinks about size

Tokens, context,
and the bill.

Everything Claude does costs a tiny amount. Before we go any further it’s worth ten minutes on how that works, so nothing surprises you.

A token is about four characters.

“Build me a trip planner” Build me a trip planner 5 WORDS = 5 TOKENS, ROUGHLY. 23 CHARACTERS. ABOUT 4 CHARS PER TOKEN.

Short message: a few tokens. A paragraph: about 100. A whole code file: several thousand. Claude’s “whiteboard” (the context window) currently holds up to a million tokens. That sounds like a lot until you start loading a whole codebase into it.

Target 50% context. Past 80%, Claude starts compacting.

When the whiteboard is half-full, Claude is at its sharpest. Past 80%, it starts compacting the earliest parts of your chat to make room, summarising what came before rather than carrying every word. Keep chats focused. Start a fresh session when you switch topics.

Costs: two ways to pay.

01

Pay-as-you-go (API)

Every message costs a fraction of a penny. No caps. You top up credit as needed. Great for low usage or weekend tinkering. (API here just means paying per message instead of a flat fee.)

02

Subscription (Claude Pro or Max)

A flat monthly price with a generous session limit (each session is a 5-hour window) plus a weekly one. Better if you’re coding every day. If you hit a cap, Claude pauses you until the window resets.

In practice

A well-written CLAUDE.md saves you tokens because Claude starts every session oriented instead of having to re-read half the project to catch up. Writing it well is a cost control, not a cost.

Check where you’re at: /usage

Any time you want to know how much of your plan’s session or weekly allowance you’ve used, just type /usage in the chat and hit Enter. Claude shows you:

  • →  Your current plan (Pro, Max, Team)
  • →  How much of the current session’s 5-hour window is used, and when it resets
  • →  How much of the weekly limit is used, and when it resets
  • →  This session’s spend so far

It also shows which skills, helpers, and connectors are eating the budget, and if you ever want a hard ceiling, /usage-credits can set a monthly cap on the Pro plan.

Peek at it once a day while you’re getting used to the rhythm. After a week or two you’ll have a feel for what’s expensive and what isn’t.

If you hit the limit

Claude tells you when the window resets (usually a few hours). You can either wait, or upgrade your plan at claude.ai/settings/billing.

The status line: your dashboard.

When Claude Code is running in your terminal, a little strip at the bottom of the chat shows you everything at a glance.

Opus 5 (1M context) on main [24% used] ▸▸ auto mode on (shift+tab to cycle) MODEL + WHITEBOARD SIZE YOUR GIT BRANCH CONTEXT USED

(A git branch is Git’s word for which draft of the project you’re working on. Chapter 18 makes it click; for now, just know the strip shows it.)

To turn it on, you don’t edit any files yourself. Just tell Claude what you want to see. In the chat, type:

Paste to Claude/statusline show the model, git branch, and context used so far

Claude Code writes a tiny script, saves it into your settings, and the status line appears at the bottom of the chat after your next message. No JSON to paste, no file to create.

Hands-on

In your trip-planner folder, run the command above. Wait a beat, then look at the bottom of the chat. Point at each segment in turn and say aloud what it tells you. That’s the dashboard you’ll glance at a hundred times a day.

Chapter 09 · Shift + Tab

Four modes,
one shortcut.

Every time Claude wants to edit a file or run a command, it pauses and asks. That’s the default, and it’s a good place to start. Sometimes you want fewer pauses, sometimes you want none. Four modes give you that dial.

Press Shift + Tab in the chat to cycle. The status line at the bottom tells you where you are.

Opus 5 (1M context) on main [24% used] > _ DEFAULT Opus 5 (1M context) on main [24% used] ▸▸ accept edits on (shift+tab to cycle) ACCEPT EDITS Opus 5 (1M context) on main [24% used] ▸▸ plan mode on (shift+tab to cycle) PLAN Opus 5 (1M context) on main [24% used] ▸▸ auto mode on (shift+tab to cycle) AUTO

The bottom of your chat, one row per mode. Shift+Tab moves you down the list and back up.

01

Default

Claude asks before every edit and every command. Best while you’re learning, or any time you’re touching something important. The status line stays quiet.

02

Accept edits

Claude edits files in your project without asking. It still asks before running commands. Best when you trust the direction and would rather read the “diff” (the before-and-after view of each change) afterwards. Status line shows ▸▸ accept edits on.

03

Plan mode

Claude reads, researches, and writes a plan, but doesn’t touch anything. When the plan looks right you approve it, and it starts building. Best before a big change. Status line shows plan mode on.

04

Auto mode

Claude runs without asking. A background safety check blocks the risky things: publishing your app live, overwriting the project’s main saved version, deleting files it didn’t create, running code pulled from the internet. Best for long, well-scoped tasks you trust. Available on all paid plans. Status line shows ▸▸ auto mode on.

Boundaries still work

Even in auto mode, if you tell Claude “don’t push until I say so” or “wait for my review before deploying”, it honours that. The safety check treats those lines as hard stops until you lift them in a later message.

Hands-on

Press Shift + Tab a few times in your chat. Watch the status line at the bottom change as you cycle. Land back on default when you’re done exploring, that’s the mode you’ll want for most of Part 2.

While you’re at the keyboard.

01

Ctrl+R finds anything.

Press it to search your recent prompts (the last hundred or so), across all your projects. That half-remembered prompt from last week is three keystrokes away.

02

Suggestions fill, never run.

Claude suggests completions as you type. Clicking one only fills the box so you can read and adjust it. Nothing runs until you press Enter.

Chapter 10 · A small helpful detail

The cache
(the one other word).

Claude has a kind of muscle memory. The first time it reads something, it’s slow. Reading the same thing again right after? Fast and cheap.

That’s the cache. You don’t need to manage it. Just know: staying inside one focused conversation is faster than restarting over and over.

In practice

Finish a thought before switching topics. Your wallet and your patience will thank you.

Chapter 11 · The four Claudes

Four brains.
Pick one for the job.

There isn’t just one Claude. There’s a family. Each has its own speed, depth, and cost. Most of the time you won’t need to choose, Claude Code defaults well. But it helps to know.

F
Fable 5

The visionary.

The deepest thinker there is.
Use for The rare, genuinely hard problem. The newest top of the family, a tier above even Opus: slowest, priciest, remarkable. One thing to know: it isn’t part of the flat Pro plan, so using it draws on pay-as-you-go top-up credits.
O
Opus 5

The architect.

Deep thought, slow steps.
Use for Hard thinking. Big decisions. Planning a whole new feature. Gnarly bugs.
S
Sonnet 5

The hero.

Balanced, quick and smart.
Use for Day-to-day building. The default for most conversations. Ships work fast.
H
Haiku 4.5

The sprinter.

Very fast, very focused.
Use for Tiny tasks. Quick lookups. When you want an answer in seconds.
Rule of thumb

Stick with Sonnet for most of today. Reach for Opus when something feels hard and you want real thought. Save Fable for the once-in-a-project puzzle. You can switch any time by typing /model, the / at the start tells Claude it’s a built-in shortcut, not a message. And if you made the presets in Hands-on #1, Part D, each brain is already one click away.

(Version numbers and plans move quickly. Check claude.ai for the current family if you want the freshest one.)

Chapter 12 · What Claude can actually do

Tools are the verbs.

Claude talks to you in English, but inside, it works through a small set of tools. Here’s the family.

01

Read

Open a file and look at it. The most basic thing, Claude can see what’s already there.

02

Write

Create a brand new file. Claude fills it in with whatever you’ve asked for.

03

Edit

Change a small part of an existing file. Faster and safer than rewriting the whole thing.

04

Run

Run any command in the terminal, installing things, starting a server, peeking at what’s in a folder. (Inside Claude this is called “Bash”, same thing.)

05

Web Search & Fetch

Look things up on the internet. Read a specific page. Pull in live data, like the weather forecast for your destination.

06

Task (Agents)

Send a sub-job to a helper. More on this in a moment.

Permission

The first time Claude uses a tool in a new folder, it asks “is this okay?”. That’s your safety net. Say yes if you trust it, no if you want to check.

Chapter 13 · Delegation

Sub-agents are
specialists.

When a job is big or distracting, Claude can spin up a helper with a single purpose, research this, review that, and get a clean answer back.

Why it matters: your main Claude stays focused on the thread of work. The helper handles the side quest.

Main Claude
the conductor
Researcher
reads docs
Reviewer
checks work
Explorer
finds files
Chapter 14 · Shortcuts with superpowers

Skills are
standard details.

An architect doesn’t re-draw the same parapet flashing on every job. You keep a library of standard details and call them by name.

A skill is the Claude version of that: a named, reusable workflow you invoke by typing a forward slash. Instead of typing out the same instructions every time, you type one word.

~ claude
> /init
(drafting your CLAUDE.md)
Done, 48 lines, saved.
> commit this, please
(reading diffs, crafting message)
Committed: “add project code to CLAUDE.md”
> /code-review
(examining your branch)
Looks good. One suggestion, line 34.

/init and /code-review come built in. Committing is one plain-English ask away; Part 4 makes it a habit.

Three things to know.

01

Type a slash.

Typing / in the chat brings up a list of available skills. You don’t have to memorise them.

02

Built-in, then the playbook’s.

Claude ships with a handful (/init, /model, /clear). Part 2 puts five more in your project, straight from Munim’s playbook.

03

They’re just files.

Each skill is a tiny file in your project that tells Claude what steps to run. Like a standard detail in a details library.

Rule of thumb

If you find yourself typing the same instructions twice, that’s a skill waiting to happen. The playbook already holds the ones this workshop needs, and Part 2 hands them to you.

Chapter 15 · How to talk to Claude

Prompting is
just good briefing.

Imagine briefing a smart friend who’s brilliant but has never met you. What would they need to know?

Weak

“Make me a trip planner.”

Too vague. Claude will guess at everything, which trip, what goes on the page, what style, and you’ll spend the next hour undoing its guesses.

Strong

“Build a single web page called Our Next Trip: the trip name, the dates, and a live countdown to departure. It’s Helsinki to San Diego, departing 14 August. Keep it minimal.”

Specific. Scoped. Claude knows what to build and what to leave out.

The three things a good prompt has

1. What, the thing you want
2. For whom / where, context Claude couldn’t guess
3. Constraints, colours, tone, size, tech, anything you care about

Paste to Claude · Try it I’m going to build a one-page planner for my next trip. Before we write any code, ask me five questions that will help you understand exactly what I want.
Chapter 16 · The one catch
!

Sometimes
Claude makes
things up.

It’s called a hallucination. Claude will confidently say a function exists when it doesn’t, or invent a library that was never built.

It’s not lying. It’s pattern-matching, and sometimes the pattern is plausible but wrong.

01

How to spot it

It sounds perfectly reasonable but something feels off. A library name you’ve never heard of. A command that fails in a weird way. Too-clean-to-be-true answers.

02

How to prevent it

Ask Claude to show its sources. Tell it to read the real docs first. Say “if you’re not sure, say so.” A good prompt beats a hallucination.

Paste to Claude · Try it Before we use any library, please check it actually exists by fetching its real documentation. If you can’t verify it, tell me so.
The safety net

And here’s the counterweight: you cannot really break anything. Claude keeps restore points of your project as it works (each time it edits a file, it first tucks away a copy of how things were), like numbered revisions of a drawing set. Type /rewind (or double-tap Escape) and you can roll the code and the conversation back to any earlier moment, even reaching back past a /clear (the shortcut that wipes the whiteboard for a fresh start). And when you come back to a session after a break, /recap gives you a one-line catch-up on where you left off.

Chapter 18 · Saving your work, properly

Git is your
revision stamp.

Every architect knows the fear of a “final_final_v7_Janika_use_this_one.dwg” moment. Git stops that happening. It gives every change a revision, a reason, and a way back.

01

Git · the revision log

A tool that lives on your Mac. Every time you save a checkpoint, Git stamps it with who, when, and what changed. You can rewind to any stamp, any time.

02

GitHub · the office server

A website that stores your Git history in the cloud. A safe copy that survives your laptop dying, and lets others see your work.

The four words you’ll hear.

Commita saved revision
A checkpoint. You made some changes, they work, you stamp them with a little message (“add the packing checklist”). Now they’re in the revision log forever. Like issuing a drawing: dated, described, filed.
Pushsend to the cloud
Once you have commits on your Mac, pushing uploads them to GitHub. This is your offsite backup and how the world sees your work. Like sending issued drawings to the office server.
Brancha parallel draft
A side-copy of the project where you try something without affecting the main version. If it works, you merge it in. If it doesn’t, you throw it away. Like a sketch study you do on tracing paper over the working drawing.
Pull Request“please merge my branch”
A formal ask on GitHub: “here are my changes, please review them, then fold them into the main version.” Reviewers can comment, you can tweak, then everyone agrees before the merge happens. Exactly like a drawing issue for comment: RFIs get raised, you respond, then it’s approved for construction.

The whole lifecycle, in one picture.

Edit YOUR MAC Commit LOCAL LOG Push GITHUB Pull Request REVIEWED Merge LIVE

Worktrees: two hands on the pencil.

A worktree is a second copy of your project on your Mac, linked to a different branch. Two Claudes can run in parallel on two different features without stepping on each other. Like giving two junior architects separate drawing sets for separate rooms so neither blocks the other.

MAIN merged feature-a Worktree A, Claude 1 working here feature-b Worktree B, Claude 2 working here
The good news

You don’t need to learn any Git commands. Just say to Claude: “please commit this”, “push to GitHub”, “open a pull request”, or “make me a worktree for this” and it handles the ceremony. You stay at the level of intent.

Chapter 19 · Now, the fun part

Let’s build
your trip planner.

One page called Our Next Trip, built the quick way: three prompts, each ending in something you can see and play with. No accounts, no API keys, no installs. Everything lives in one file on your Mac.

01

The scaffold

Trip name, dates, and a live countdown to departure, ticking away on the page.

02

The refine

A packing checklist. Click an item to tick and strike it, click again to undo. The browser remembers, even after you close it.

03

The stretch

Your itinerary drawn as stops on an Underground-style line, plus a little notes box that keeps whatever you scribble.

04

Make it yours

Swap in your real trip, then pin the page to your iPhone so it opens like an app. A little adventure for another evening.

Today’s target

All three prompts, one sitting. A page you’d happily show a friend tonight. That’s a win.

Why this project

It runs on made-up data in your own browser, so nothing can go wrong outside this one folder. And every trick in it (a page that updates itself, a list that remembers, a drawing made of code) is a building block you’ll reuse in everything you make after it. Part 3 is where you build an app of your own from scratch, on your own phone.

Deep breath

You can’t break your Mac doing this. The worst that happens is some code doesn’t work, and we start that bit over. Messy is normal. Nothing is final.

Pause · Hands-on #3

Kick it off.

You’re in the trip-planner project folder with Claude running. Time to steer. These prompts are starting points, change the words to suit you. The sample trip is Helsinki to San Diego; if you’ve got a real one coming up, use it instead.

Step 1 · The scaffold

Start with the smallest real thing.

Copy this and paste it to Claude, then watch it work.

Paste to Claude · first Let’s build a personal trip planner, smallest version first. Create a single web page called index.html titled “Our Next Trip”. It shows the trip name, the dates, and a live countdown to departure that updates by itself. Use this sample trip: Helsinki to San Diego, departing 14 August at 09:15, returning 21 August. I’ll swap in my real trip later.

I’m not a coder. Explain what you’re doing as you go, in plain words.

Everything lives in this one file: no installs, no accounts, no internet data needed. No styling yet, plain and simple is fine. When you’re done, tell me exactly how to open it in my browser.

What you should see: Claude narrating in plain words as it goes: a short plan, a permission ask before it creates index.html (say yes), then a wrap-up telling you how to open the page. A few minutes, quiet patches included; quiet means working.

Step 2 · See it live

Open your creation.

Once Claude says it’s done, find the index.html file in your trip-planner folder (use Finder) and double-click it.

What you should see: your browser opens, and a countdown to Helsinki’s departure is ticking, live, on a page that didn’t exist ten minutes ago. Keep that tab open: after each step below, refresh to see the new version. If the folder looks empty in Finder, use Superset’s own Open or Reveal button for the project; some versions keep their work in a separate area.

Didn’t work? Not a problem, and not rare. Paste the error or describe the blank page back to Claude and say: “Here’s what I see. What do you think is going wrong?”

Step 3 · The refine

Add the packing list.

Paste to Claude · next Now add a packing checklist to the page. Start it with ten sensible items for a summer city trip (passport, chargers, that sort of thing) and give me a way to add my own. Clicking an item ticks it and strikes it through; clicking again unticks it. Use localStorage so the browser remembers my ticks: when I close the page and come back tomorrow, the list should be exactly as I left it.

What you should see: refresh the browser tab and the checklist is there. Now test the remembering: tick two items, close the tab completely, open index.html again. Still ticked. That’s localStorage doing its quiet magic.

Step 4 · The stretch

Draw the journey.

Paste to Claude · last Time for the showpiece. Draw the itinerary as stops on a London-Underground-style line: one coloured line, white station circles, a name and a time at each stop. The stops are: Home, Helsinki Airport, San Diego Airport, Hotel in the Gaslamp Quarter. Below it, add a small free-text notes box for trip thoughts, and make it remember what I write with localStorage, the same way the checklist does.

Then make the whole page beautiful: calm colours, nice typography, generous spacing. Something I’d be proud to send to the person I’m travelling with.

What you should see: refresh, and the page has become a little product: your journey drawn as an Underground line, a notes box that keeps what you scribble (write a note, refresh, it stays), and the whole thing suddenly looking like someone designed it. Because someone did: you.

When it all works, one last line to Claude: “Save a checkpoint, and write what we built into CLAUDE.md so the next session starts with the plan in mind.”

If Claude gets stuck

Say: “Show me the error in your own words. What do you think is going wrong?” And if a change made things worse, /rewind (Chapter 16) rolls you back to before it.

Appendix · Keep this open

The little
dictionary.

Every word you’ll hear, in plain English. Bookmark this page. You’ll come back to it.

Terminal
The black window with text where you type commands. Claude Code lives here.
Command
A line of text you type to make the computer do something. Like “open this folder” but written in computer language.
Folder (Directory)
Same thing. “Directory” is the old word. Your projects live in folders.
File
A single document. Code is written into files. You’ll have lots of them.
Context
Everything Claude can see right now in this one conversation. The shared whiteboard.
Context window
The maximum size of the whiteboard. When it fills up, the oldest things fall off.
Memory
Notes Claude keeps between sessions. Usually stored in a file called CLAUDE.md.
CLAUDE.md
A special text file where you write rules, preferences, and project info. Claude reads it automatically every time.
Prompt
Whatever you type to Claude. Could be a question, an instruction, or just a thought.
Model
The specific version of Claude you’re talking to. Fable, Opus, Sonnet, Haiku, different speeds and depths.
Tool
A specific action Claude can take, reading a file, running a command, fetching a web page.
Agent / Sub-agent
A helper Claude spawns to handle a focused side task, like research or reviewing.
Hallucination
When Claude confidently says something that isn’t true. Rare, but worth watching for.
Cache
Claude’s short-term speed-up. Recently-read things are remembered briefly so they’re faster next time.
API
A way for apps to talk to each other. The weather app on your phone uses one to fetch the live forecast.
API key
A secret password that lets an app use a paid service on your account. Leak one and strangers can run up your bill within minutes, so keys live in a safe, never in files. If one ever escapes, you “rotate” it: swap the old key for a fresh one, like re-keying a lock. This project needs none; later parts teach the safe way.
localStorage
A little pocket of storage every browser gives a web page. Your trip planner uses it to remember your ticks and notes between visits.
Git
A tool that gives your project folder perfect memory. Save versions of your work so you can always rewind.
Commit
A saved checkpoint. Like saving your place in a game. You can always come back to this exact version.
Repo (Repository)
A project folder tracked by Git. Every version you’ve ever saved is remembered.
Skill / Slash command
A shortcut you type like /code-review to run a pre-made mini-workflow.
Hook
An automatic check that runs at a certain moment. Like a safety rule: “warn me before deleting anything.”
MCP Server
A plug-in that gives Claude new abilities, talking to your calendar, browsing websites, etc. Advanced stuff.
Spec
A written description of what you’re building and what it should do. The source of truth for the project.
Diff
A side-by-side view of what changed in a file. Green lines are added, red lines are removed. Claude shows you one each time it edits.
Bash
The language used in Terminal. When Claude says it’s “running a Bash command”, it just means typing something in the terminal.
Bug
Something broken. The code doesn’t do what you expected. Fixing bugs is just detective work.
Superset
The Mac app that runs Claude Code in a calm, visual way. One window per project, files on the left, chat on the right. You can even run several agents at once.
Workspace
Superset’s word for a project folder opened in Superset: the folder plus its chat, in one tab. Switching projects is just clicking a different tab.
Preset
A saved launch button at the top of Superset. One click presses its command for you (yours says claude). Made once in Hands-on #1, used forever.
Spotlight
The Mac’s everything-finder. Press ⌘ + Space, type the name of any app, press Return.
The playbook (Ship It)
Munim’s folder of building methods and starter kits, refined over real projects. Part 2 hands you the key.
The safe (Doppler)
The locked place where secret keys live, so they never sit in plain files. Part 2 teaches it; Part 1 needs no keys at all.
Worktree
A sealed-off copy of your project on your Mac. Lets two things happen at once without collision. Superset uses them automatically.
Branch
A side-copy of your project you can experiment on. Like a tracing-paper study over a working drawing. Merge it back if it worked.
Push
Uploading your commits to GitHub. Makes them visible to others and safe from a lost laptop.
Pull Request (PR)
A formal proposal on GitHub to fold your branch into the main version. Reviewers comment, you refine, then everyone agrees before it merges.
Merge
The act of taking a branch and folding its changes into the main version. Usually happens at the end of a pull request.
LTS
Stands for “Long Term Support”. The steady, well-tested version of a tool. Always pick the LTS option when downloading.

End of Part 1.

You know more than enough to ship the first version. The rest you’ll pick up by doing.

Build the planner. Break it. Ask silly questions. Change your mind. That’s the whole job.

When you’re ready, open Part 2: Breaking Ground.

Open Part 2  →

Made with for Janika.

Now go and ship something.